Food photography is about producing eye-catching images of food for advertising purposes. In this simple guide, we’ll tell you about some tricks to take culinary photos, which can capture the viewer’s attention and make you want to try the dishes you will photograph. If you are the owner of a bar, a restaurant or pizzeria, you want to advertise your business. You cannot afford a professional photographer, or if you are a beginner photographer. You are thinking about dedicating yourself to this subject; we recommend following this guide step by step to learn to photograph food and propose your menu in the best possible way. If you haven’t read the first, second, and third parts of this blog yet, we recommend checking them out to master the art of culinary photography!
The “Culinary Stylist”, a Key Player in Food Photography
Not only are photographers a key player in this type of photography, but specialists such as “culinary stylists” can work side by side with the photographer to achieve the perfect photograph. This specialist is in charge of making the food on the plate stand out with techniques and tricks so that the result is delectable and palatable. The ‘culinary stylist’ should preferably be a chef with cooking experience and photography skills rather than a foodie photographer.

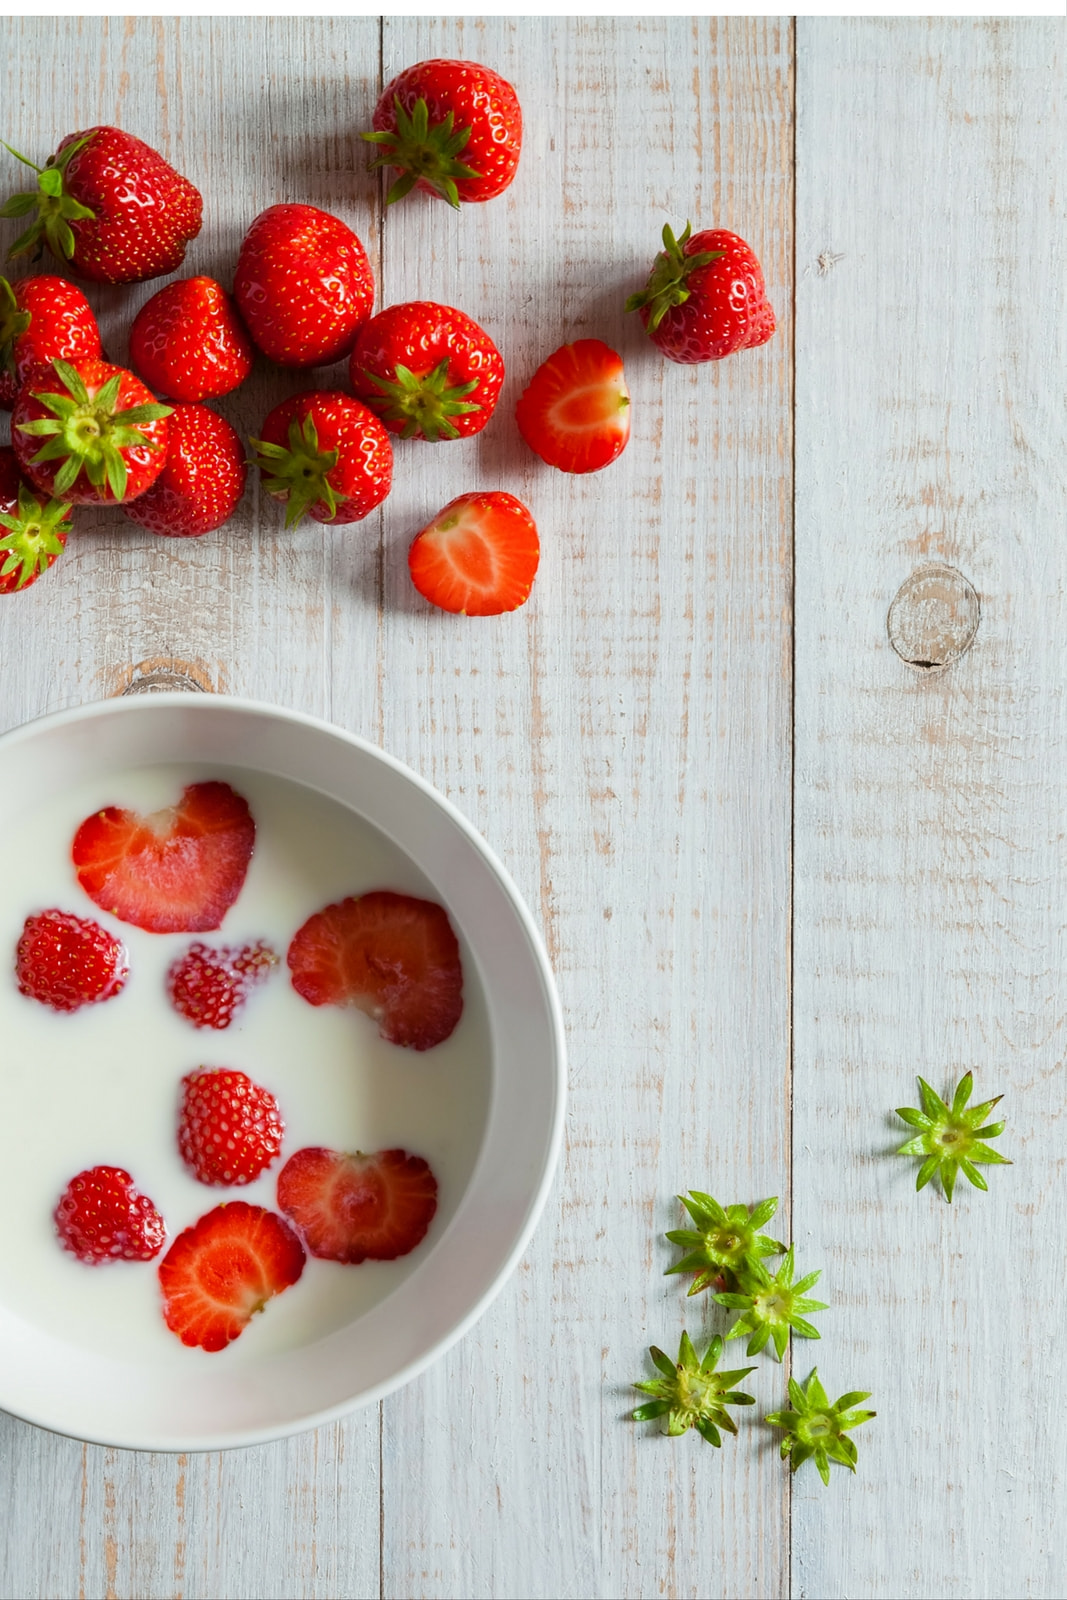
This allows the stylist to know exactly how long a plating can be effectively photographed before it goes bad. Meats, vegetables, sauces, or a lovely strawberry dessert can quickly brown, wrinkle, crack, or lose their initial texture. The culinary stylist has photographic notions of working on lighting and food chemistry to know that, for example, after half an hour under the flashes, a flavourful steak will turn into a flabby mass of meat impossible to photograph. Once we have the necessary human and technical team to take our photos, we can only get down to work…

Point of View and Depth of Field

You must take into account the point of view and depth of field. If you use a lot of field depth, you are visually distracting: your focus point will no longer be food. As we mentioned before, it is very helpful if you make a storyboard to know how much depth of field you want to give to an image.
If you want everything to be in focus and there is no depth of field or some elements not in focus, go for it! You don’t have to follow the rules, do a test moving certain factors to see if it works for you. Remember not to overdo it with overcrowding of objects because you can have a very busy image. Avoid zooming in; better get closer: this way, you will better define what is on the table.
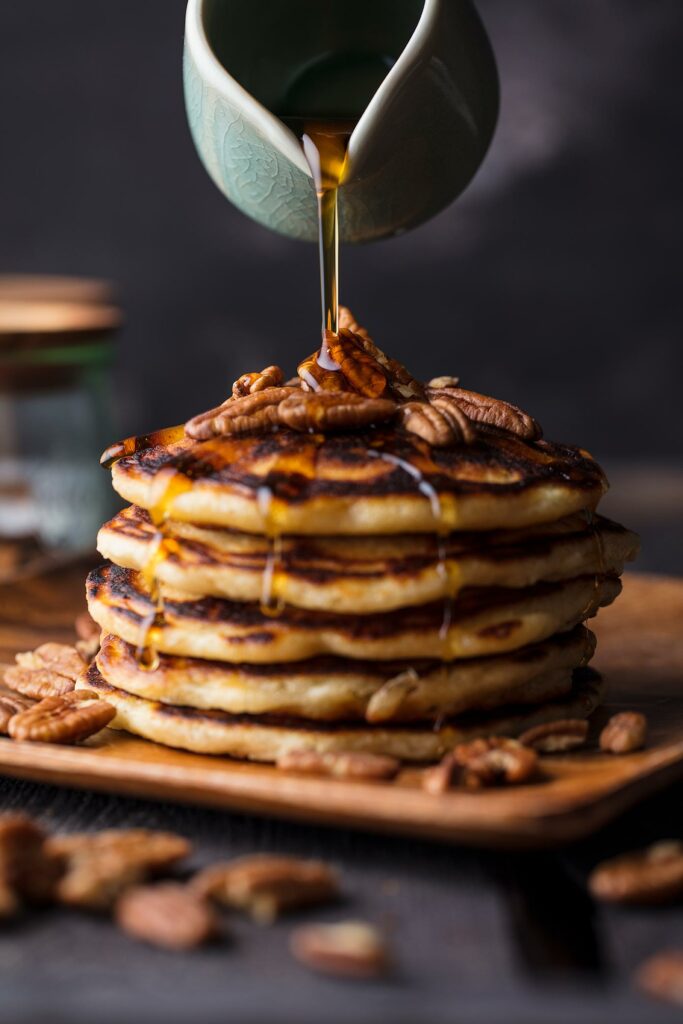
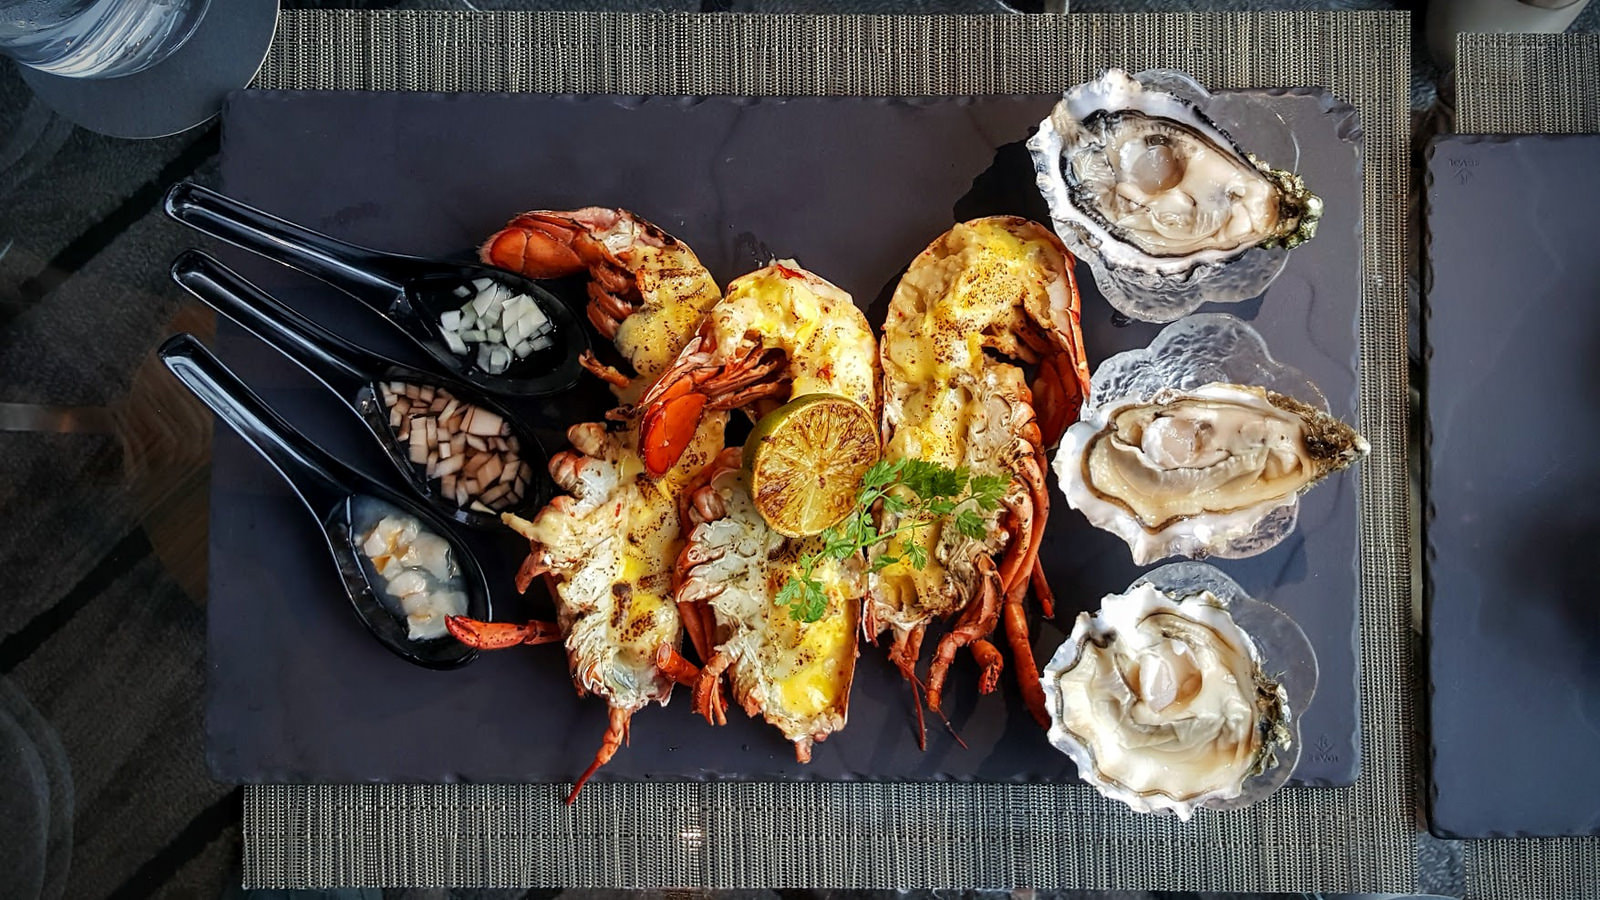
It is often advisable to take side photos to enhance the volume of the food. Also, dare to make one from above. Although they are not the best for highlighting, they are Instagram favourites, emphasizing how the food is served and a few ingredients.
Other Expert Tips
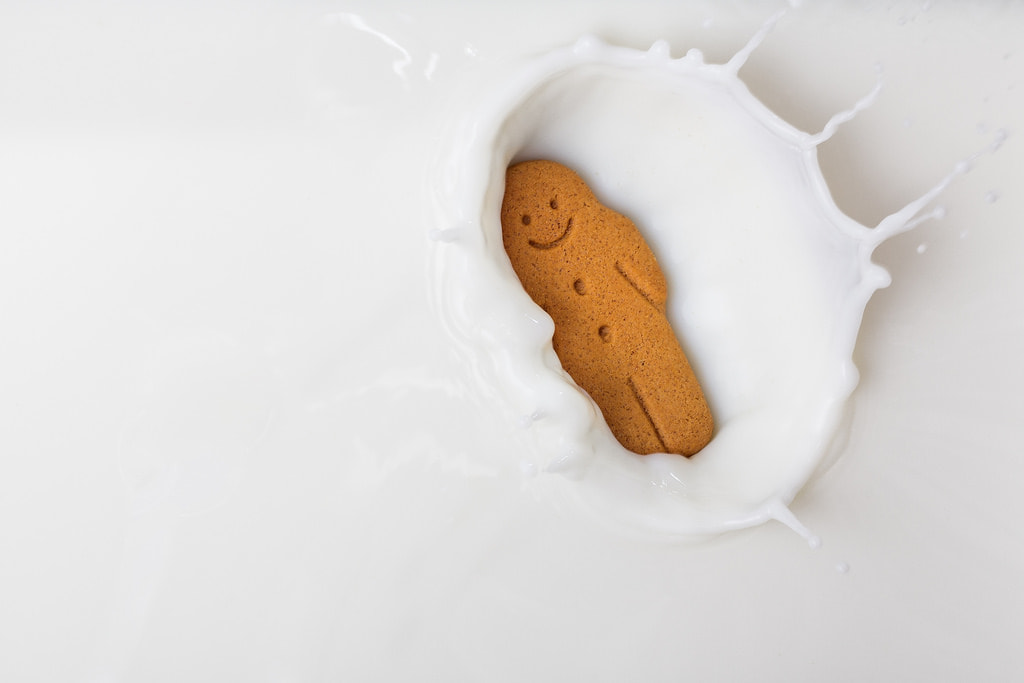
It is no secret that the world of photography is full of secrets. That’s why we reveal other widely used food photo tricks. Ice cream, milk, maple syrup, steam, and whipped cream are some of the things that aren’t real. Not because the photographer does not want to use them, but because they do not give the desired effect or because sometimes handling them for a long time is impossible: the steam dissipates, and the ice cream melts.
For this reason, experts substitute white glue for milk, which on occasions they even reduce with water. Not only will the “milk” look whiter, but it has excellent consistency in case you want to take a moving photo.
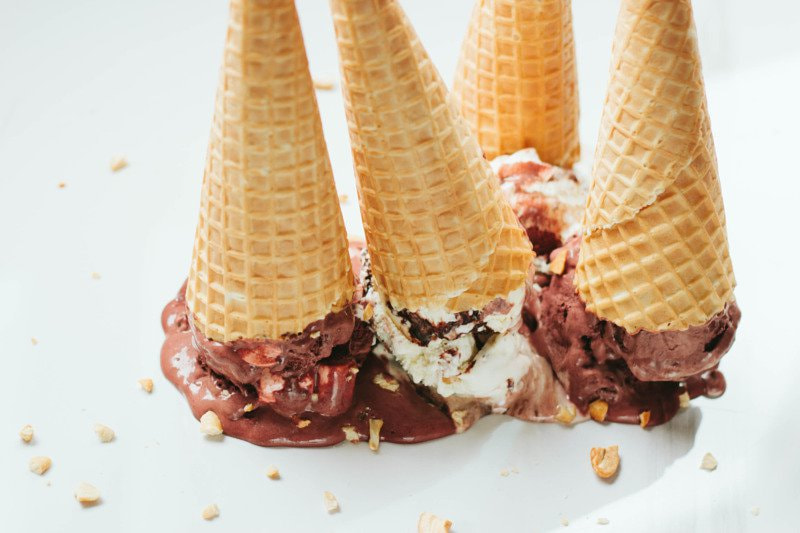
Imagine a scoop of ice cream with flashes and diffusers. It just wouldn’t last for a 30-minute session. That is why it is replaced with mashed potatoes intervened with some colouring. Now, you can take the time you need, and your “ice cream” will remain in excellent condition.
Drops on the surface of a bottle of water or freshly washed fruit are often actually silicone droplets. If you need foam to emphasize a soda or beer, combine it with a little dish soap. You will see fabulous results! Remember that some details can only be fine-tuned in editing to get a perfect final result for a packaging photo.
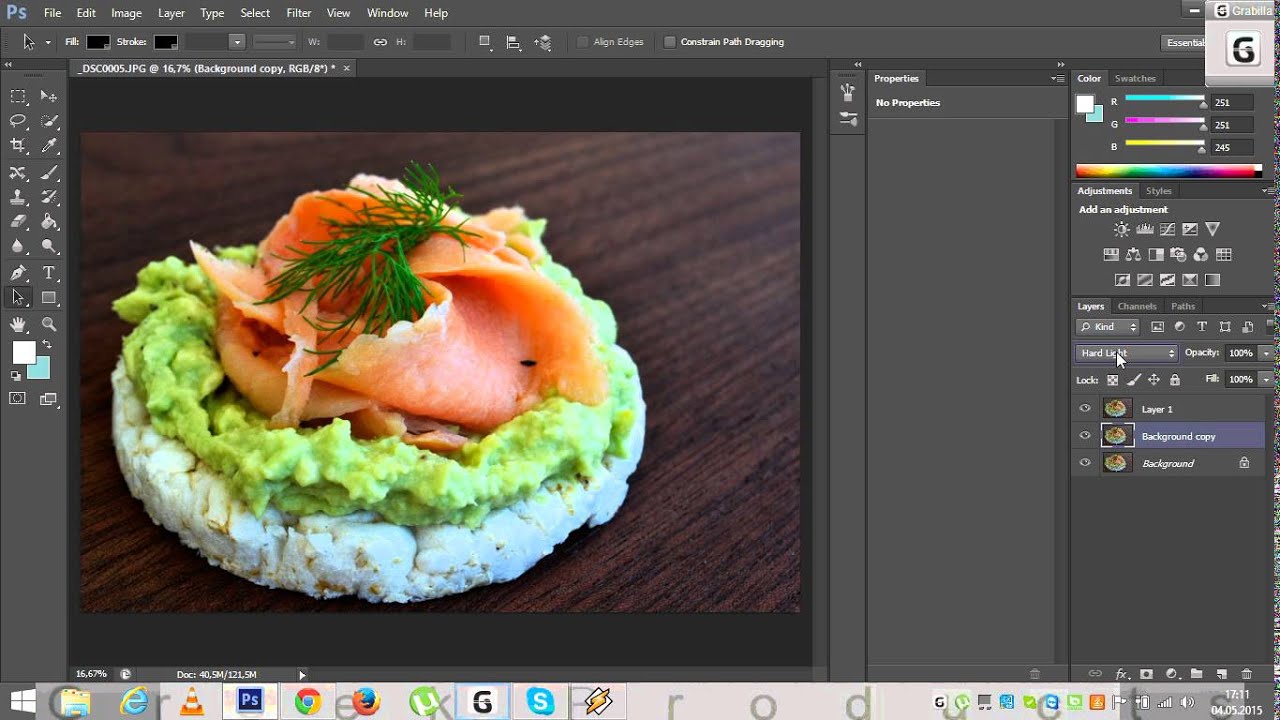
Editing
However, before photo-editing, we suggest you review all your photos: zoom in and see even the smallest detail. If you still don’t like them, you still have time to re-capture the best angle. If your photos are ready, it’s time to edit them! You can adjust the contrast, brightness, resize and even add a font to design an ad or banner.
Practice and Experiment
Never hesitate to ask a restaurant if you can take pictures. Most are very accessible, and in many, the staff even get involved. If you prefer to start in the kitchen at home, perfect: just remember that food loses its consistency and appearance as time passes. Share your photos with us, and don’t forget to tell us what gastronomic photography tricks you used or if you have any tips you want to share with us.
Pingback: Top Secrets To Making Your Food Photos Look Deliciously Tempting (Part 3) – Good vacation